Adding a testbench
Prerequisites
When setting up a new testbench or a new device for testing, do get it online and connected in the backend, you need to set up the testbench as a dummy customer in salesforce.
Testbench network
If you want to have a testbench being reachable via VPN, have a look here: _l-testbench-network.
Email
We have one gmail account that is the master email account for all of our test benches:
Email account |
|
Password |
EnpalTestlab123 |
Phone Number |
015120762333 (Johannes Eberle) |
If you need access or further information, reach out to the team.
All of our test benches are using aliases, so that all of the emails our benches are receiving go to this one mail account (i.e. useful for when you are trying to link a test bench to the Enpal app). Since most alias mail services are only free for a limited amount of aliases, we are using three different alias services. See Testbench overview.
Salesforce account
Create a SF admin ticket to create dummy SF customer accounts not included in business reporting similar to SSA-3418 Ten test customers
Provide manufacturer, type and serial number of the inverter
Provide the email
Wait for completion
Get device online and in monitoring state. After that, connect SF, IoT, Balena through install page as usual and push system to operations state in IoT backend.
Move system to operations
Create CustomerID for test system and have an IoT device with an UUID
Create a salesforce account
The customer ID has the format DE0001234
The UUID of your IoT you can find in Balena
Create a SystemID via the install page by mapping CustomerID and UUID to one another
Go to the install page https://install.enpal.de/<customerID> of your customer, which should be empty:
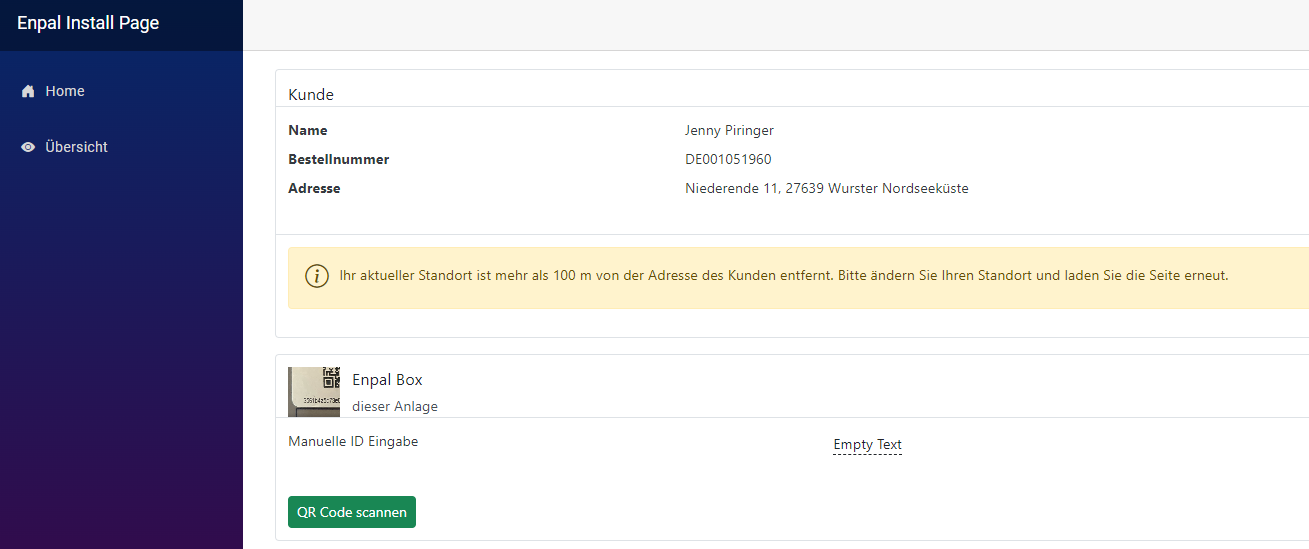
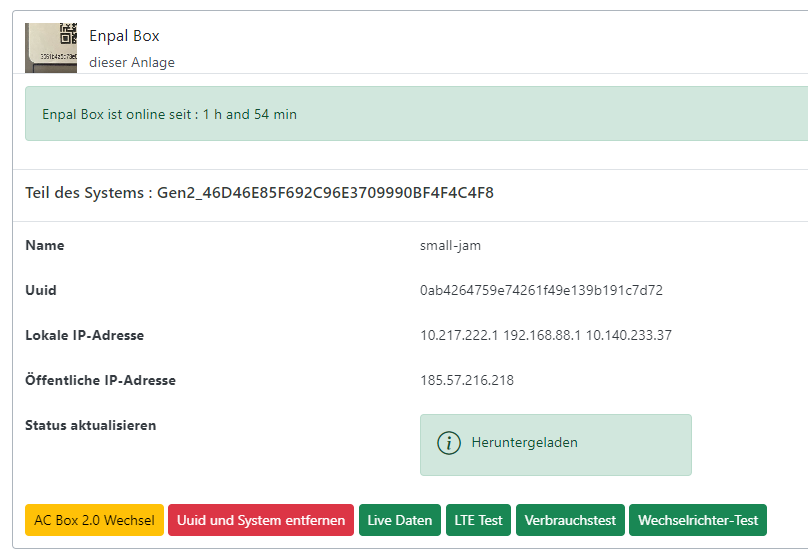
Click on “Empty Text” next to “Manuelle ID Eingabe” and copy&paste the UUID of your IoT.
This way you create a SystemID that is mapped to the UUID and CustomerID:
Map CustomerID to Dashboard
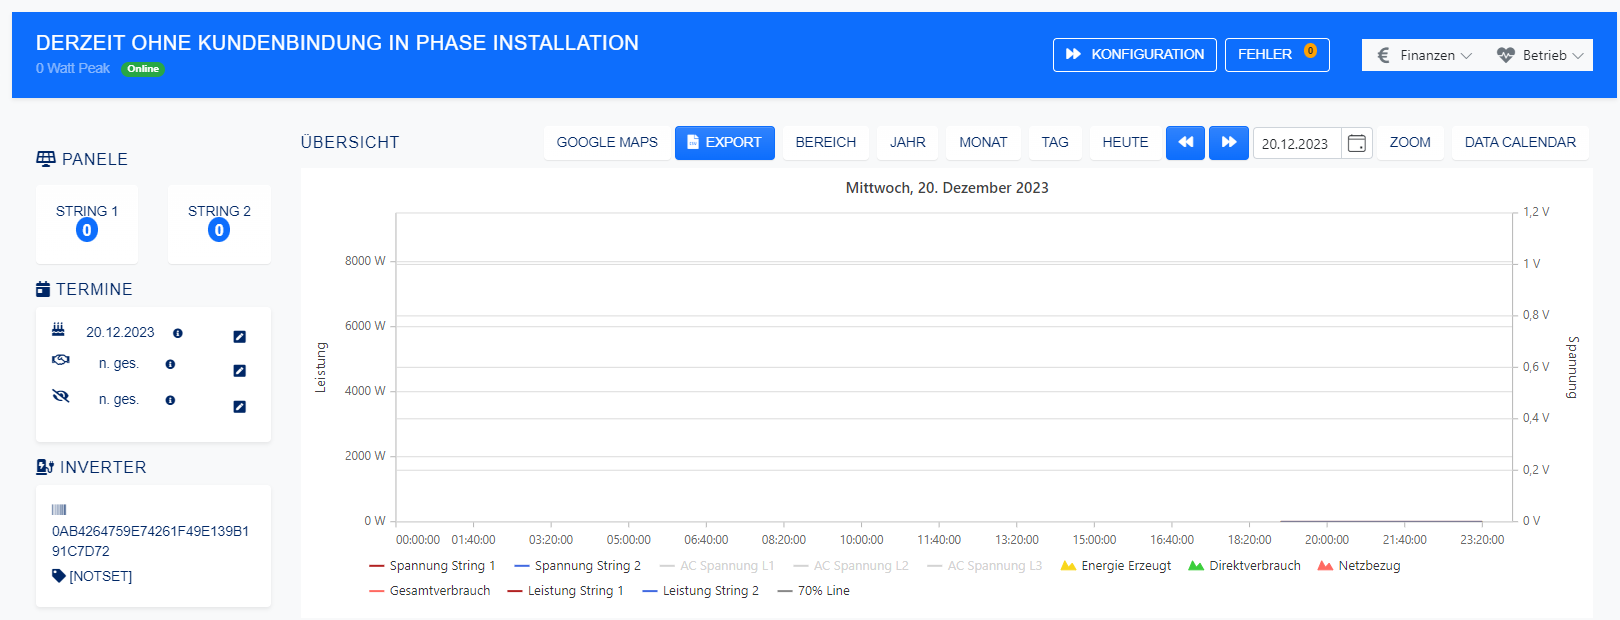
Go to the IoT Monitor page with the SystemID you created (i.e. https://iot.enpal.de/NextGenDashboard/Gen2_13FC6F5DC74314BC138DF2483BEA8E56).
It will be empty and “Ohne Kundenbindung”:
In the top right corner click the “Betrieb” button and then “Kunde auswählen”:
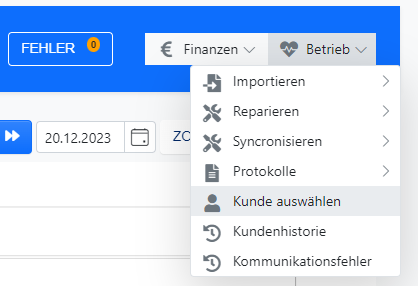
There you again put in the CustomerID of your test Salesforce account.
If you don’t have the “Betrieb” button than ask Chris Mülling for help.
Move system into monitoring state
Now you have to wait until your IoT is sending properties of the system to the backend
After around 30-60 mins you will see the inverter serial number being displayed in the Dashboard:
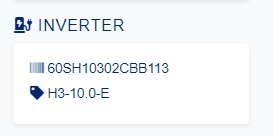
Now all you need to do is press the “Konfiguration” button and directly afterwards the “Monitoring” button in the blue bar at the top:

If you did everything correctly you will have a nice Dashboard with live monitoring of your test system:

Testbench overview
Account 1
Service |
|
Account |
AnonAddy |
Password |
EnpalTestlab123 |
TB |
SF Customer ID |
Costumer ID |
Email Address |
|---|---|---|---|
1 |
C000619358 |
DE000623766 |
|
2 |
C000619441 |
||
3 |
C000619452 |
||
4 |
C000615423 |
||
5 |
C000130576 |
||
6 |
C000619462 |
||
7 |
C000619468 |
||
8 |
C000619502 |
||
9 |
C000619515 |
||
10 |
C001030180 |
Account 2
Service |
|
Account |
|
Password |
EnpalTestlab123 |
TB |
SF Customer ID |
Costumer ID |
Email Address |
|---|---|---|---|
11 |
C001076321 |
||
12 |
C001076396 |
DE001144606 |
|
13 |
C001293919 |
DE001400926 |
|
14 |
C001357499 |
||
15 |
C001357053 |
||
16 |
C001357078 |
||
17 |
C001357388 |
||
18 |
C001357455 |
DE001477923 |
|
19 |
C001585486 |
||
20 |
Account 3
Service |
|
Account |
|
Password |
EnpalTestlab123 |
TB |
SF Customer ID |
Costumer ID |
Email Address |
|---|---|---|---|
21 |
|||
22 |
|||
23 |
|||
24 |
C001755756 |
||
25 |
HP ONLY CUSTOMER |
||
26 |
|||
27 |
|||
28 |
|||
29 |
|||
30 |