Creating your own automated test pipeline
We offer a template that can be used to create custom pipelines for different testing usecases.
Option 1. Tests resolve testbenches themselves
If the tests that you want to automate are defining the testbenches that you want to run against, then this option is best suited.
For example, a test that looks like this:
# this test will run against testbenches, that are part of the inventory that don't have a testbrain configured.

filter = InventoryFilter(with_testbrain=False)

@pytest.mark.no_brainer_all
@pytest.mark.parametrize(
    "testbench",
    get_inventory().filter_inventory(filter),
)
def test_example(testbench):
    brain = TestClient(default_timeout=30, tb=testbench)
    assert brain.car.is_connected() is False
Warning In the above example you will run the test against all testbenches that the inventory filter resolves.
Consider if this is necessary before proceeding. For example consider an alternative snippet
BENCHES = (
   get_inventory().filter_inventory(InventoryFilter(id="TESTBENCH_10"))  # Fox H3
   + get_inventory().filter_inventory(InventoryFilter(id="TESTBENCH_19"))  # Fox Smart
   + get_inventory().filter_inventory(InventoryFilter(id="TESTBENCH_02"))  # Huawei
)
@pytest.mark.parametrize("testbench", BENCHES)
def test_example(testbench):
   ...
Here, the testbenches are statically set with the
idproperty which means the tests will be ran against those 3, TESTBENCH_10, TESTBENCH_19 and TESTBENCH_02, which avoids surprises.
Step 1. Using the template to define custom pipelines.
The following example defines at pipeline that will run at midnight UTC
trigger: none # trigger none so CI won't trigger the tests

schedules:
  - cron: 0 0 * * * # replace with your schedule or remove it if you just want to trigger manually.
    displayName: Run at midnight_utc
    branches:
      include:
        - main

# don't change this, the resource is needed for the template to work
resources:
  containers:
    - container: python-base-ref
      localImage: true
      image: python-azurerunner-base

extends:
  template: ../templates/run_custom.yml
  parameters:
    pytest_marker: "no_brainer_all" # edit this
Add a new file inside the directory custom_pipelines with a unique name and once it’s been pushed and merged, proceed to create this pipeline in azure.
Copy the above example or use the snippet inside a .yml file: nsp for “new static pipeline”
Step 2. Creating the pipeline in Azure Devops
After mering this to main you must create the pipeline in Azure Devops.
Go to the pipeline overview and click on new pipeline, within the
Automated Testsfolder
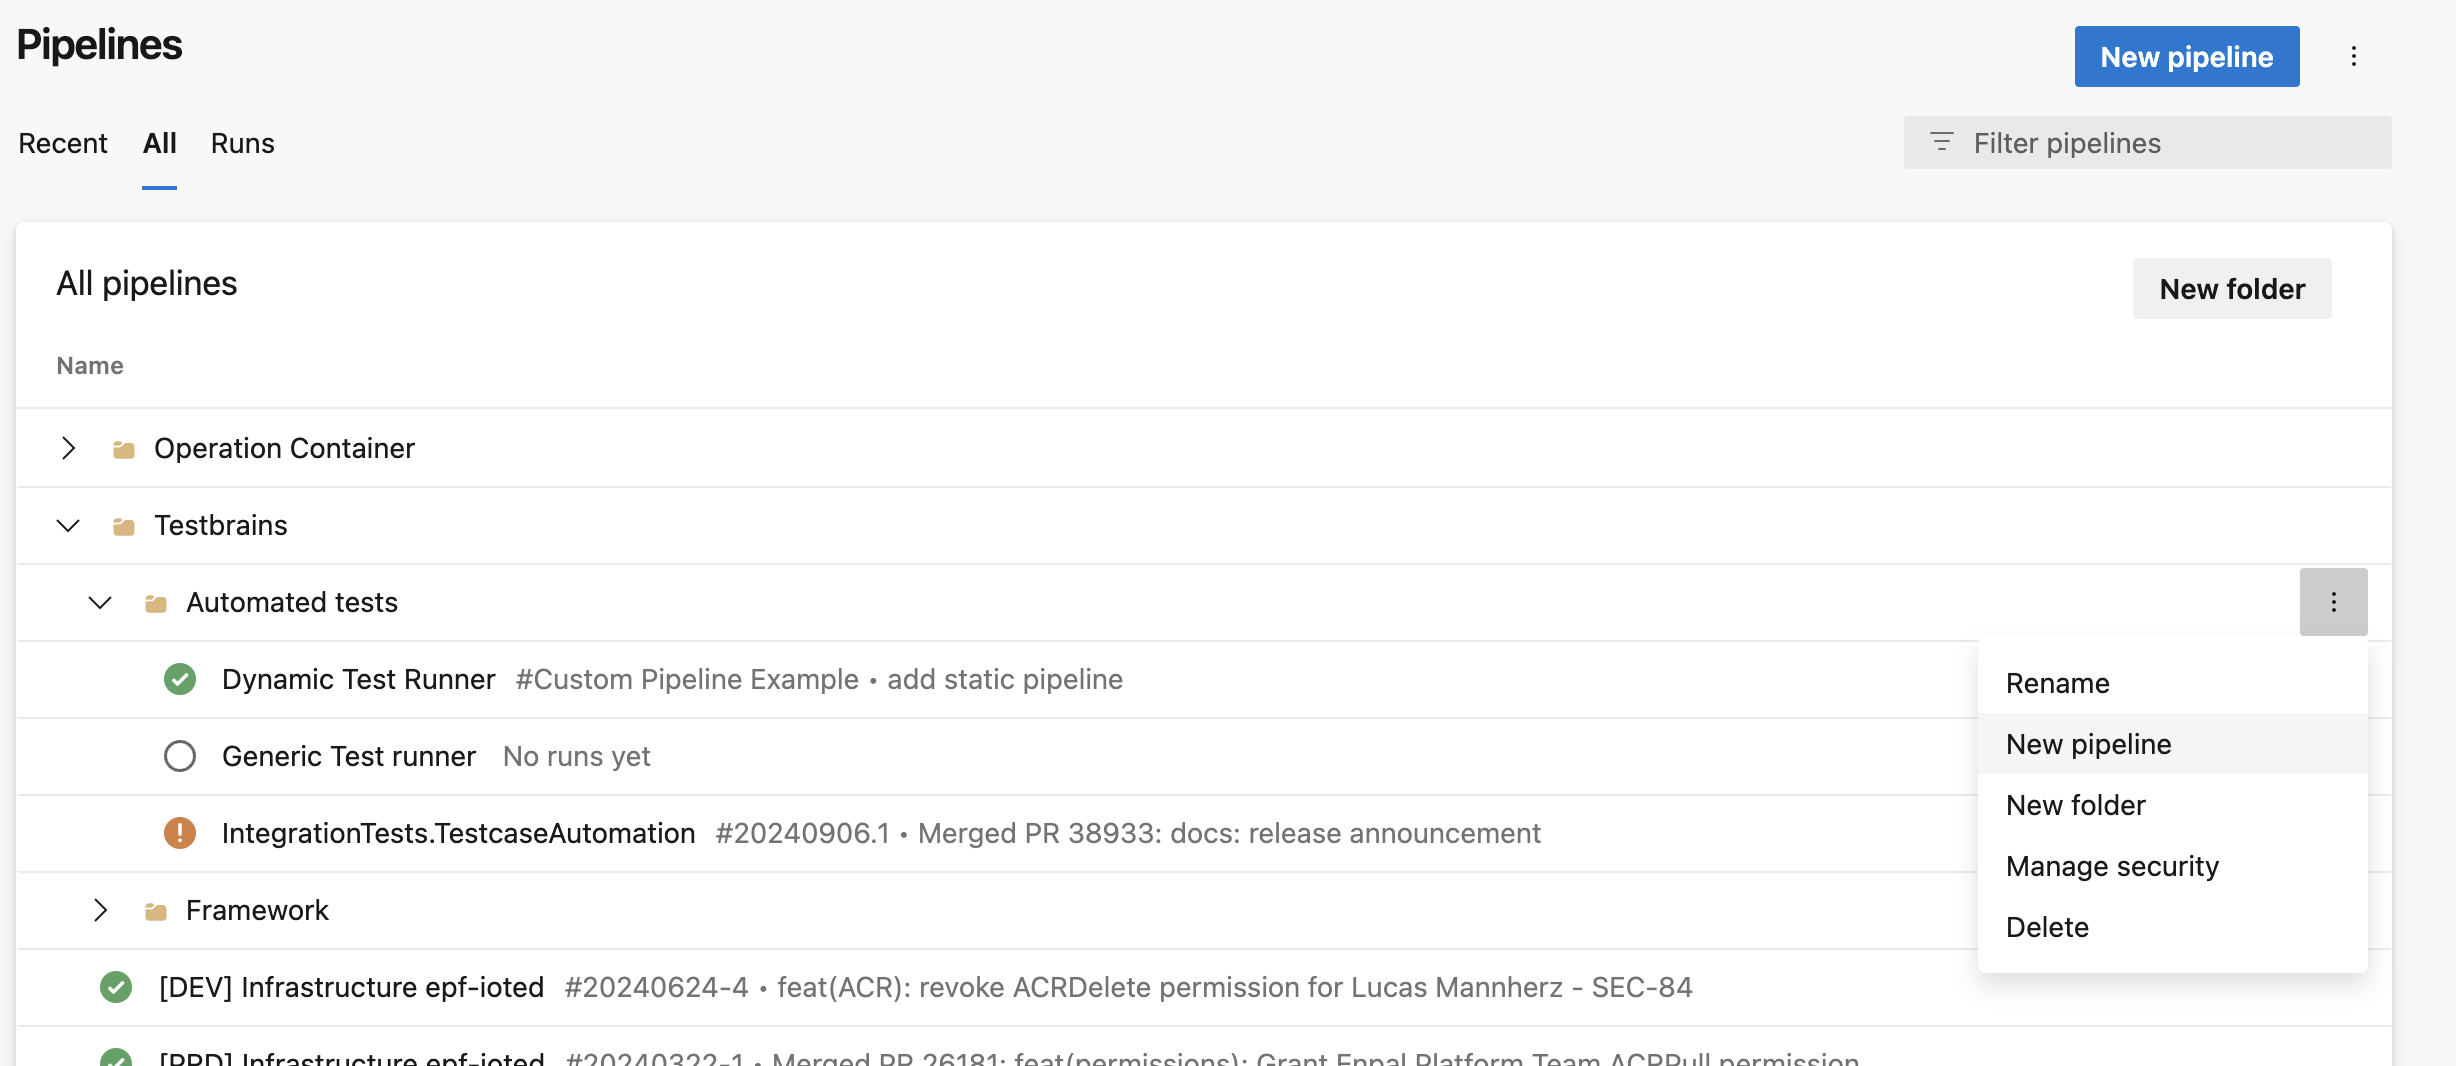
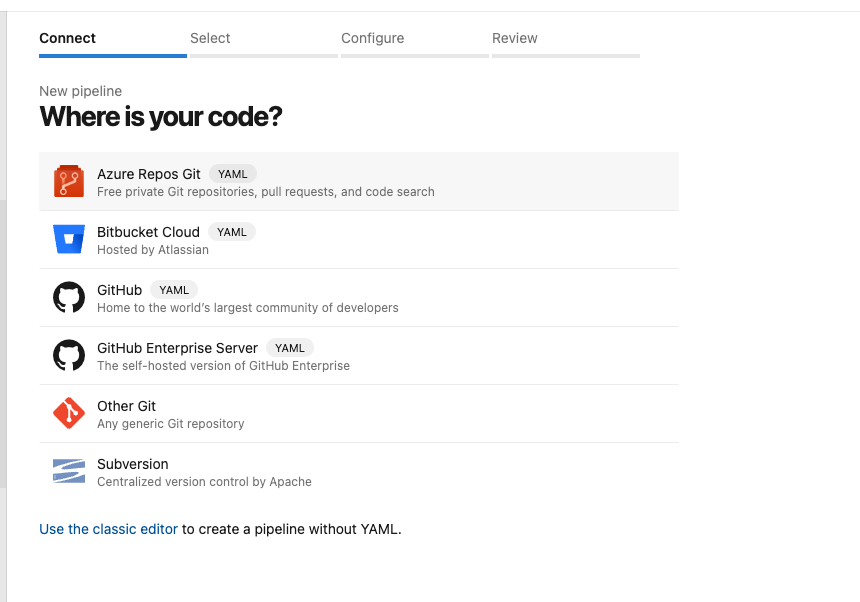
Select “Azure Repos Git”
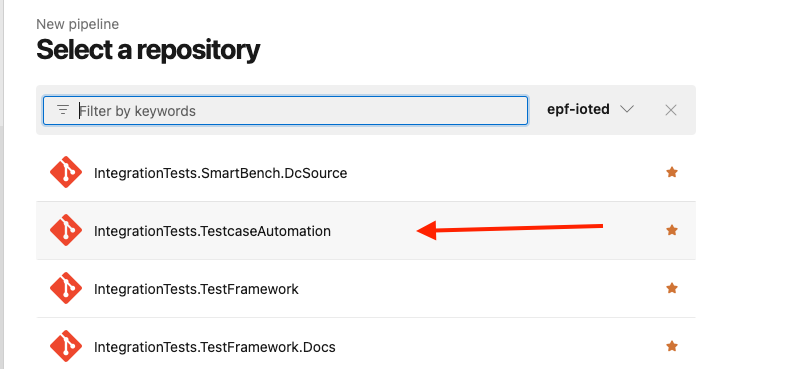
Select the repository
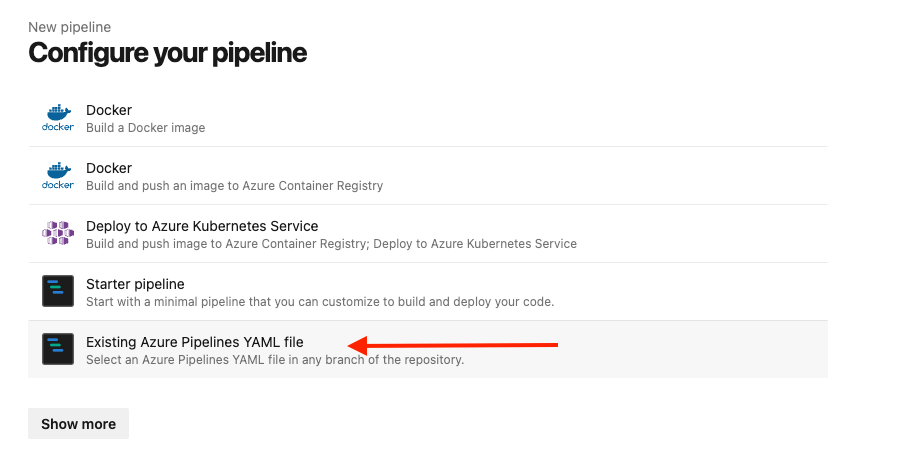
Click existing pipeline
In the dropdown menu find the file you created and click continue.
Verify the contents, click the 3 dots and click “save” 🥳
If you configured a schedule, you can verify the schedule is set up properly by clicking the 3 dots:
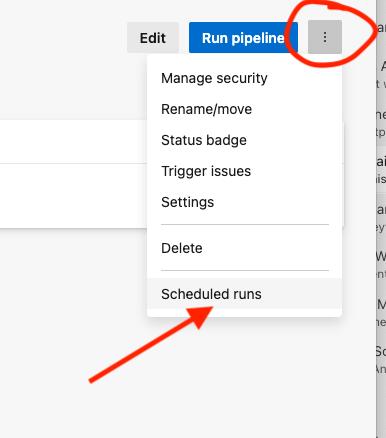
Then clicking Scheduled runs
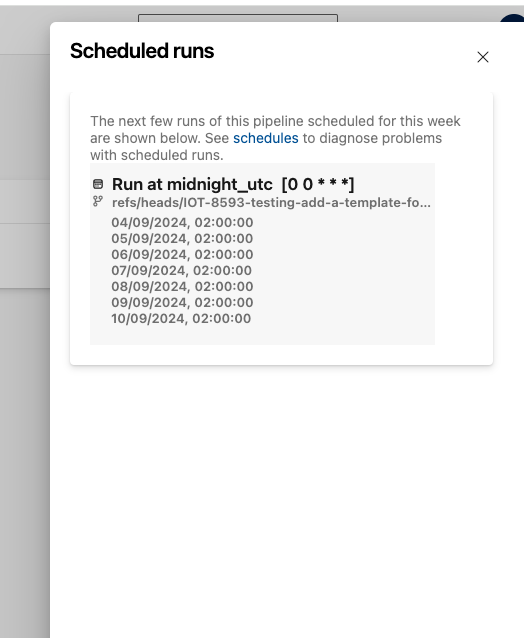
You can run the pipeline manually or wait for the schedule to take place.
Now you should have a pipeline that is ready to be ran 🎉, but notice the name of the pipeline seems off.
The last step is just to give the pipeline a name that makes sense by clicking Rename/Move

Option 2. Dynamically resolving benches with environment variables
Before release 2.0, the testbench target was resolved with overridding a settings file OR setting this variable as an environment variable. This has the benefit of being able to chose the bench dynamically, in the pipeline.
Doing this, means that the tests can be made generic and triggered manually with parameters that will resolve the desired testbench, from Azure Devops pipeline UI.
The pipeline template exposes a number of parameters that make this possible. See the file .azuredevops/templates/run_custom.yml
parameters:
  - name: pytest_marker
    displayName: Pytest Marker
    type: string
  - name: TESTBENCH_ID
    displayName: Testbench IDs e.g "TESTBENCH_13" (comma seperated for multiple)
    type: string
    default: "any"
  - name: TESTBENCH_TYPE
    displayName: Testbench type
    type: string
    default: "any"
    values:
      - "PVSYSTEM"
      - "WALLBOX"
      - "any"
  - name: TESTBENCH_MANUFACTURER
    displayName: Testbench Manufacturer
    default: "any"
    type: string
    values:
      - "StarCharge"
      - "FoxESS"
      - "Huawei"
      - "Sungrow"
      - "any"
  - name: TESTBENCH_WITH_TESTBRAIN
    default: "any"
    displayName: Testbench with testbrain
    type: string
    values:
      - "true"
      - "false"
      - "any"
The underlying template is also used to generate static test pipeline, but since the only required parameter is
pytest_marker, you don’t have to expose these parameters when creating a new state pipeline. However, when we want to have a dynamic pipeline we should expose these, so they can be modified in the Azure Devops UI.
Step 1. Prepare your test(s)
Since this option uses environment variables, the way the tests have to be written are slightly different.
# tests/examples/test_running_from.pipeline.py
import pytest
from testframework.inventory.datamodel import InventoryFilter, TestBench
from utils.helper import get_inventory

inventory = get_inventory()
filter_from_env = InventoryFilter.from_env()

testbenches = inventory.filter_inventory()
# dynamically resolving testbenches from environment variable, when testing locally this is set in config/.env_vars
# when running from pipeline, set via parameters instead
@pytest.mark.YOUR_MARKER_HERE
@pytest.mark.parametrize("testbench", testbenches)
def test_from_env_bench(testbench: TestBench):
  # test logic
  #...
If you already created a pytest marker you can replace the marker with the correct one, if not - create a new by adding one to pytest.ini.
# pytest.ini
[pytest]
addopts = -p no:cacheprovider
markers =
    ...
    my_new_marker: my_marker_description
    ...
Step 2. Create a new .yml file in custom_pipelines directory
Within this file,
type
"ndp" or "new dynamic pipline". This will populate your file with a template.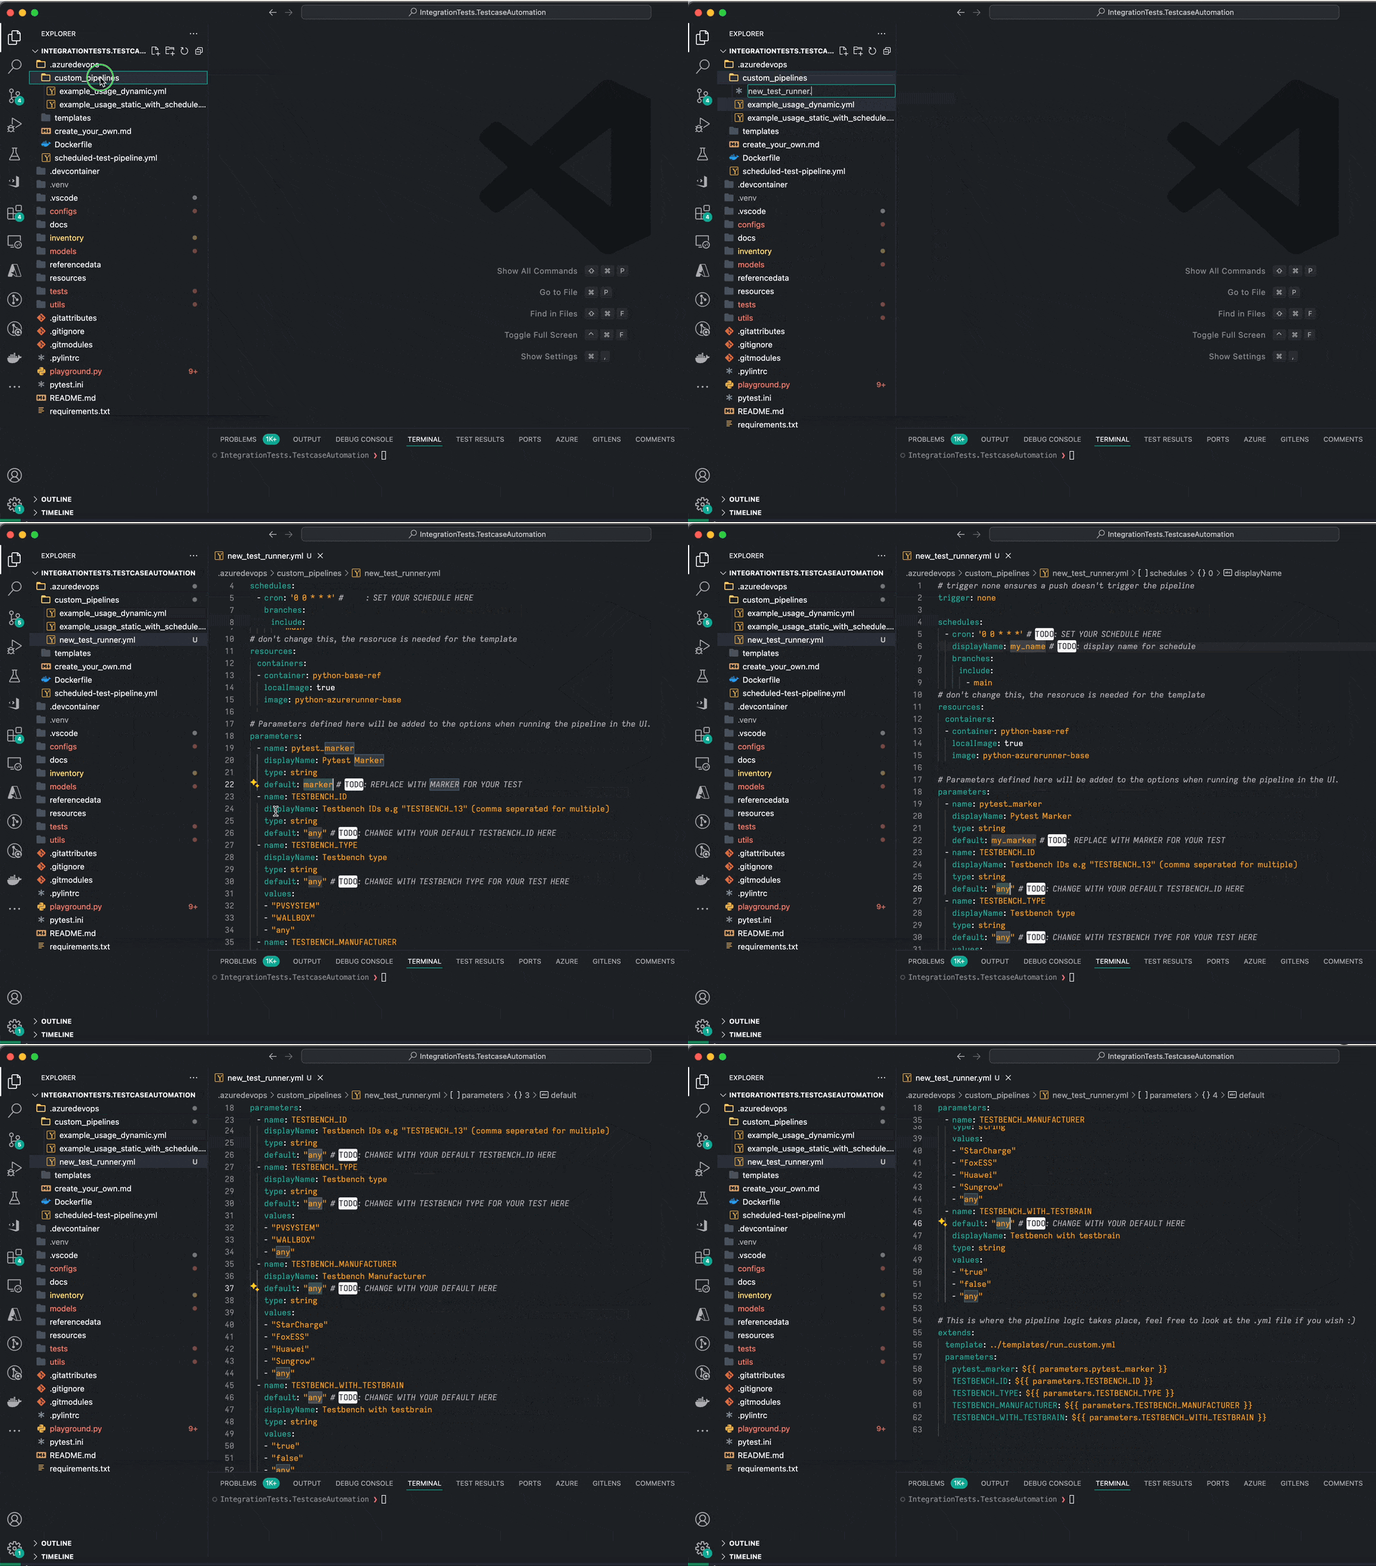
Fill out the parameters as indicated by the comments in the file, they are marked with
TODO:.
By setting the default values of the parameters, you’re specyfing which parameters will be used in the schedule. By having the
parameterssection, you also enable manual invocation via the pipeline UI. If you don’t need this you can remove the parameters and just add your values directly in the template parameters underextends:
# trigger none ensures a push doesn't trigger the pipeline
trigger: none

schedules:
  - cron: "0 0 * * *" # TODO: SET YOUR SCHEDULE HERE
    displayName: name # TODO: display name for schedule
    branches:
      include:
        - main
# don't change this, the resoruce is needed for the template
resources:
  containers:
    - container: python-base-ref
      localImage: true
      image: python-azurerunner-base

extends:
  template: ../templates/run_custom.yml
  parameters:
    # Setting parameters directly, no option to override by manual invocations
    pytest_marker: "my_marker"
    TESTBENCH_ID: "any"
    TESTBENCH_TYPE: "any"
    TESTBENCH_MANUFACTURER: "any"
    TESTBENCH_WITH_TESTBRAIN: "any"
Commit the file and open a PR. Once approved and merged proceed to step 3.
Step 3. Create pipeline in azure devops
Follow the same steps as documented in Option 1