Hosting Infrastructure
service overview
proxy portainer certificate heimdall inventory
Supervisor overview
Lenovo Thinkcenters are used as hardware for hosting various applications. For management, Proxmox is installed on all of them as supervisor.
As a base OS for VM’s, Ubuntu is the common choice.
Machine name |
IP |
DNS |
Function |
|---|---|---|---|
buildmachine001 |
10.250.15.16 |
User build machine in Dahlewitz |
|
buildmachine002 |
10.250.15.24 |
Azure pipeline runner in Dahlewitz |
|
buildmachine003 |
10.250.15.32 |
Not used |
|
buildmachine004 |
10.250.15.40 |
Not used |
VM Overview
VM name |
IP |
DNS |
Function |
|---|---|---|---|
SSH Remotesessions |
10.250.15.17 |
remotemachine1.lab.enpal.io |
SSH Jump host for “local” development in Dahlewitz |
Pipelineagent Dahlewitz (Enpal) |
10.250.15.25 |
remotemachine2.lab.enpal.io |
Dahlewitz Enpal azure runner
Dahlewitz Energycloud azure runner
THE HUB
|
Remote development
Some tasks require a low latency for execution such as modbus development. By connecting to a builder which is located at the same location the latency of the VPN and internet can be reduced.
Each user has an own account set up on this machine, which can then be used to open a remote connection via SSH.
Setting up a new builder
Normally, docker is set up in a “rootfull” setup, which means the docker daemon gets executed with root privileges and only once. Users then can get added to the “docker” group, which allows them to use docker as usual.
Since usage is easy, the downside is (beside other security aspects) that all users share the same docker daemon, which means when one user runs a container, and another user prunes the system, the container for the first user will crash. It is not easily possible to ensure non-interfering between users with only one docker daemon. As a solution, rootless-docker can be used (Rootless mode), where each user runs and uses an own docker-daemon. That way, the docker environments are completely encapsulated for the user.
Disable rootfull docker
1systemctl disable docker.service docker.socket --now
Install required package(s)
1sudo apt update && sudo apt install uidmap -y
Reboot the machine
Docker does not work anymore, you will not be able to start containers.
This is to be expected. Go to the next section.
Creating a new User
Each user needs a separate setup once. Steps were only tested in BASH.
Optional: Create a variable so commands do not need to be changed. Change <user> to the new one
Usually users have the email, e.g: lucas.mannherz
1export NEW_USER="<user>"
Add the user
1sudo useradd -m -s /bin/bash $NEW_USER
Add users public SSH key so login is possible
You need the users public ssh key here and insert it into the placeholder.
1sudo mkdir -p /home/$NEW_USER/.ssh && sudo touch /home/$NEW_USER/.ssh/authorized_keys
2sudo chmod 700 /home/$NEW_USER/.ssh && sudo chmod 600 /home/$NEW_USER/.ssh/authorized_keys
3sudo chown -R $NEW_USER /home/$NEW_USER/.ssh
4echo "<ssh_public_key>" | sudo tee -a /home/$NEW_USER/.ssh/authorized_keys
Yank users password (they are not supposed to use sudo or login with a password)
1sudo passwd -d $NEW_USER
Install rootless-docker
1sudo systemd-run --no-ask-password --system --scope su $NEW_USER \
2    <<< "/usr/bin/dockerd-rootless-setuptool.sh install"
Add docker socket location to bash environment
1echo 'export DOCKER_HOST=unix:///run/user/$(id -u $USER)/docker.sock' \
2    | sudo tee -a /home/$NEW_USER/.bashrc
You should now be able to use docker as you are used to as the user.
Future todos/possibilities
Enable lingering for users so docker container can continue running without the user being logged in. This is required to make rootless-docker behave like the normal rootfull docker daemon. Only do this if we have usecases which require this behavior.
Enable lingering for loginctl: /etc/systemd/logind.conf change “KillUserProcesses” to “no”
Automate setup and maintenance with ansible
Figure out quota (important because rootless-docker uses up space for each user)
Azure runner
By executing pipelines in the local network at the target location, no VPN is needed for the pipeline and a better latency can be achieved. Select the runner you want to use in Azure DevOps, and the pipeline will run in the local network.
Keep in mind that this runner is not hosted in the cloud, so the availability, reliability and speed might be reduced.
THE HUB
THE HUB is the central entry and management point for our testlab. It provides an overview about the hosted services.

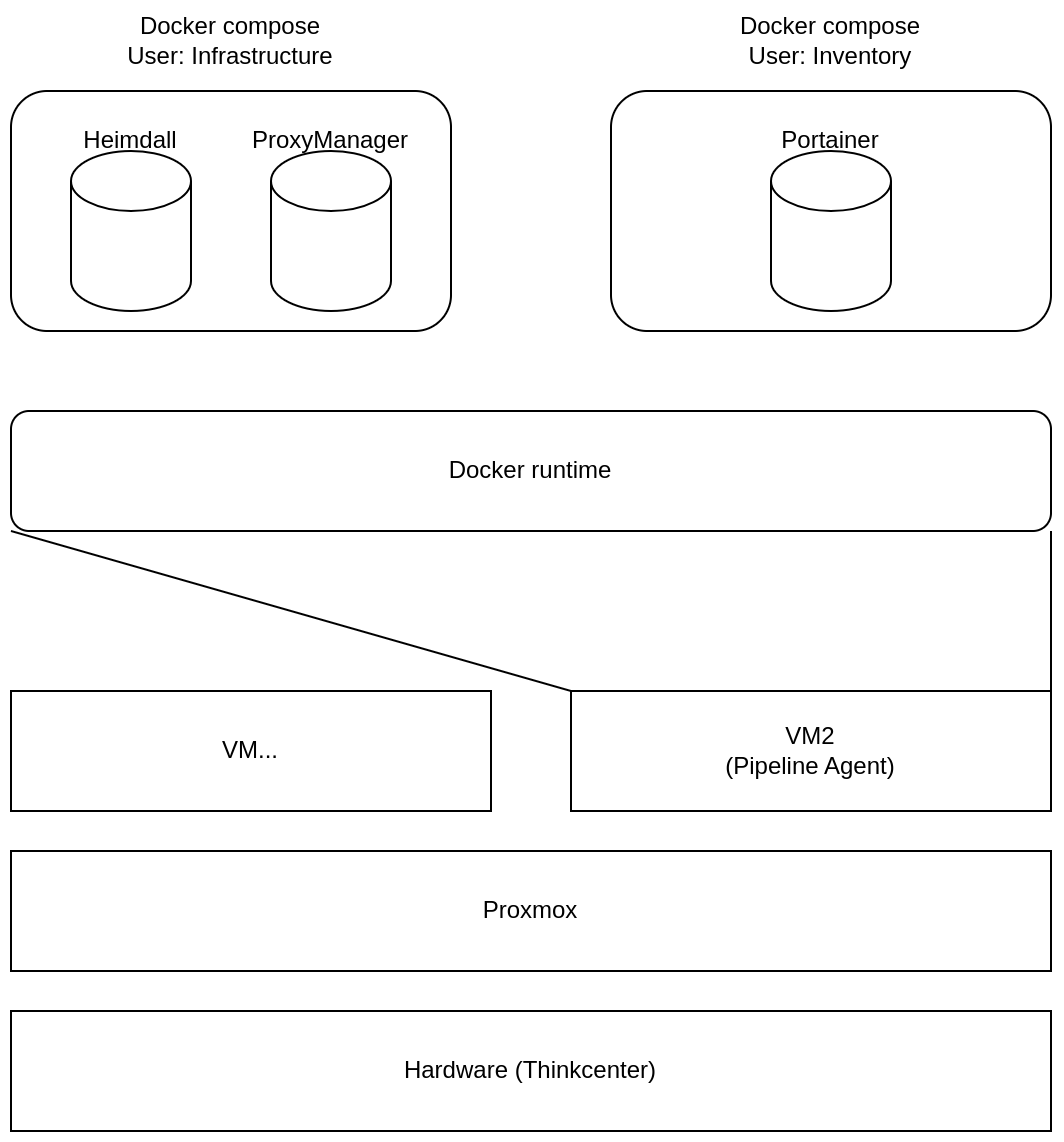
THE HUB is being hosted on the Pipelineagent Dahlewitz VM. Everything is hosted via containers and the full stack looks as follows:
Two compose files are being used to provide a basic hosting setup, which gets maintained via portainer and a proxy later:
Basic web infrastructure (User: si)
Heimdall (Entry page THE HUB)
Portainer (User: inventory)
docker-compose for portainer1services: 2portainer: 3 image: portainer/portainer-ce:latest 4 volumes: 5 - portainer:/data 6 - /var/run/docker.sock:/var/run/docker.sock 7 ports: 8 - "8000:8000" 9 - "9000:9000" 10 - "9443:9443" 11 restart: unless-stopped 12 13volumes: 14portainer:
All other features are being maintained via the Proxy Manager and Portainer.
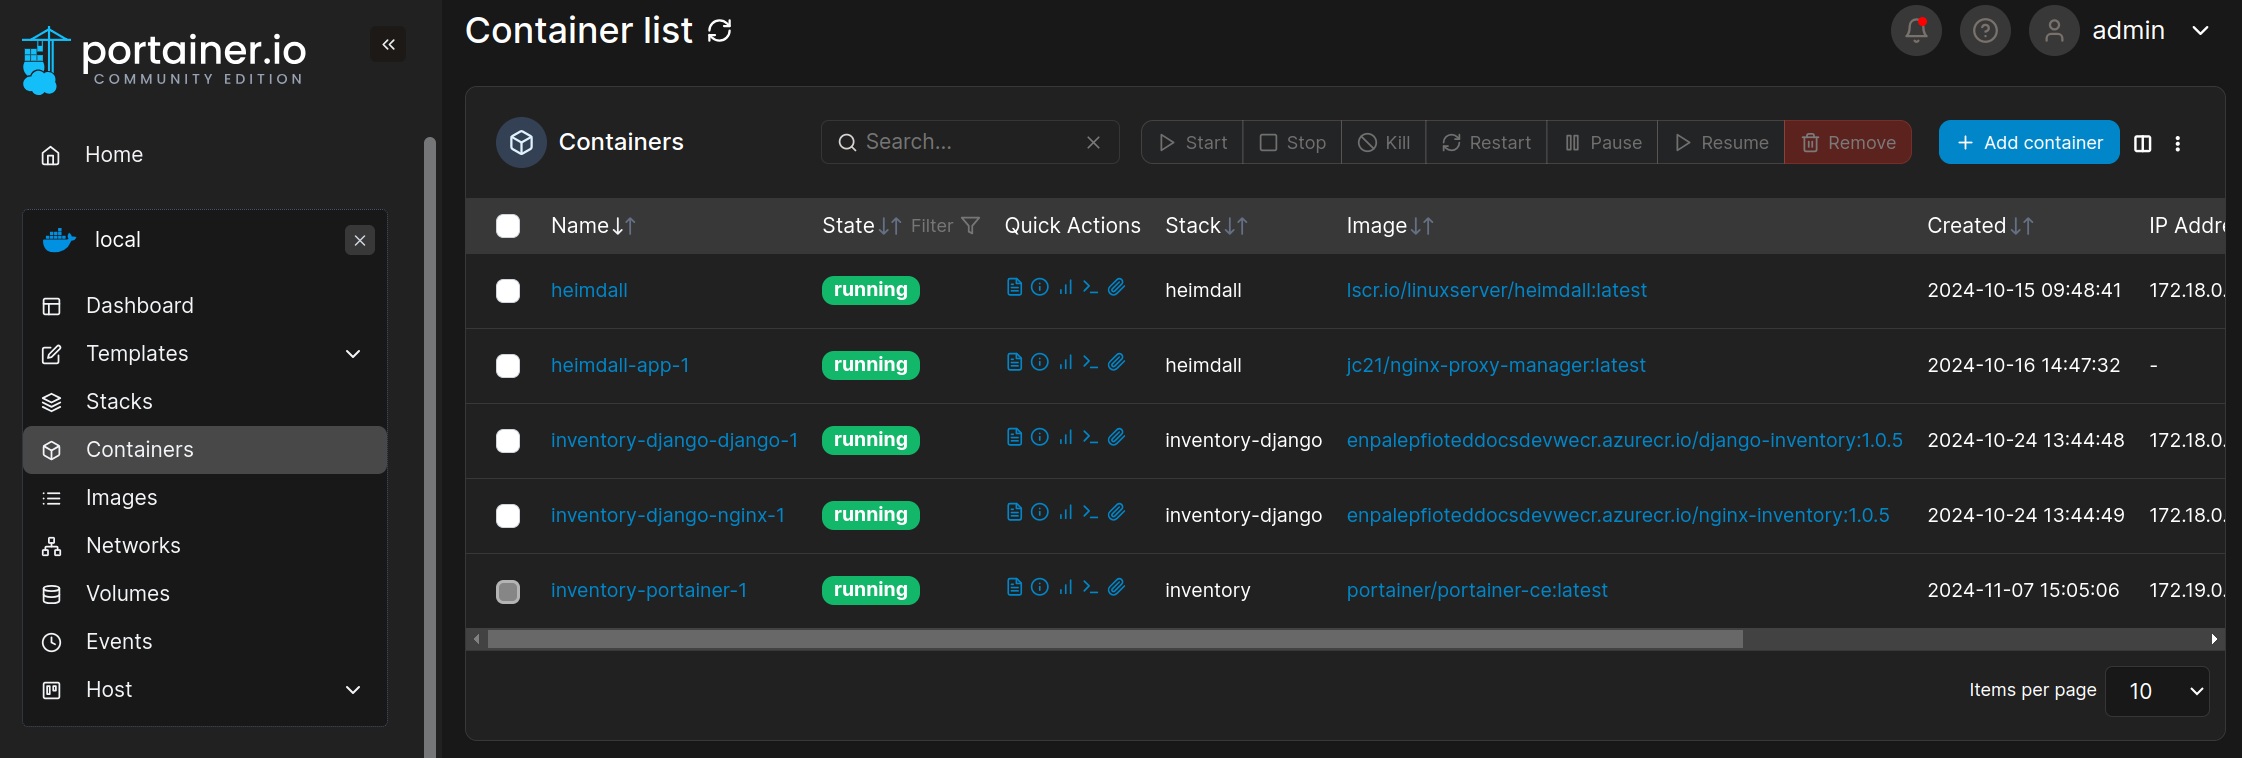
If you want to add another service to the lab, simply go to the portainer. There you can manage all other running containers and create a new one:
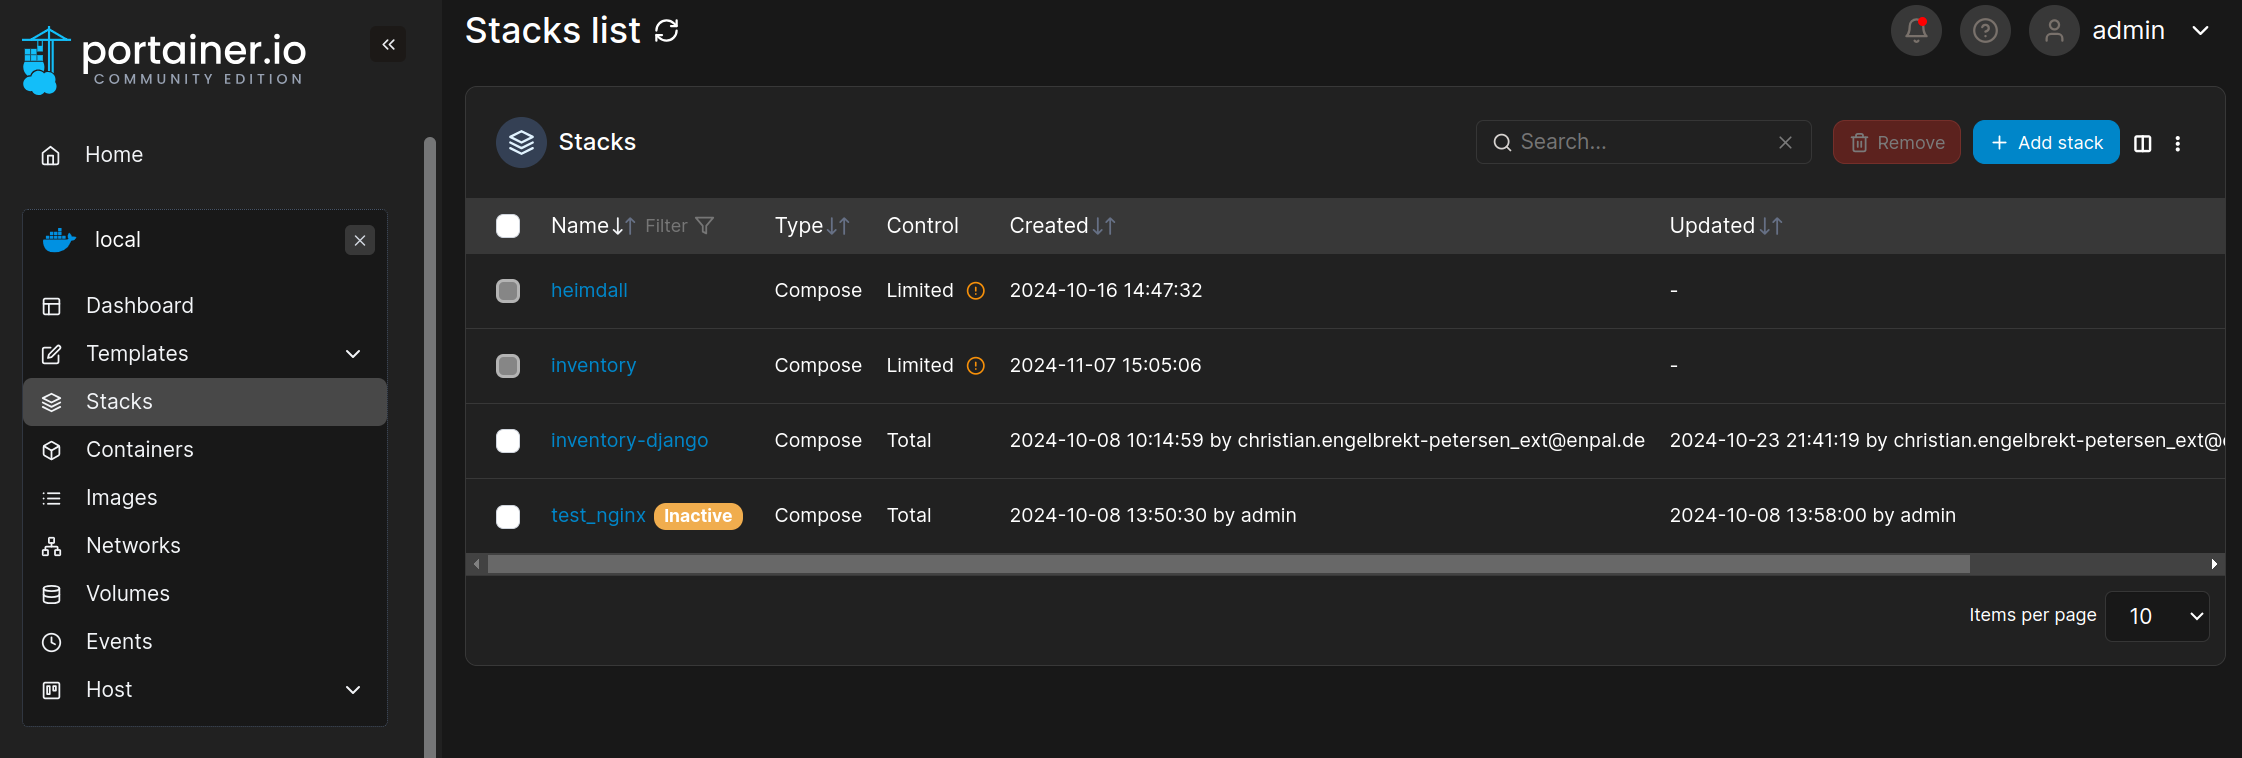
Or, like the inventory, a new stack (just a docker-compise file)
Reverse Proxy
The Proxy Manager is used to easily manage access to the services. Services are provided on different ports on the host machine, and the proxy serves them depending on the called sub-domain.
Therefore, the complete typical way to visit the hub can look like this:
Look up DNS in our Azure DNS zone
Connect to the IP in the entry
This IP is the Host, and port 443 is being served by the proxy
Depending on the sub-domain (e.g hub.lab.enpal.io) the service on the respective port gets forwarded
You hopefully see the resource you wanted to access
In our Azure DNS zone is a wildcard entry: *.lab.enpal.io. This entry points to the Host IP of THE HUB Host if no further specified entry is available such as a testbench.
Hint
Specifying an unkown subdomain such as unkown.lab.enpal.io will redirect you to hub.lab.enpal.io. This is a setting in the reverse proxy.
Certificate
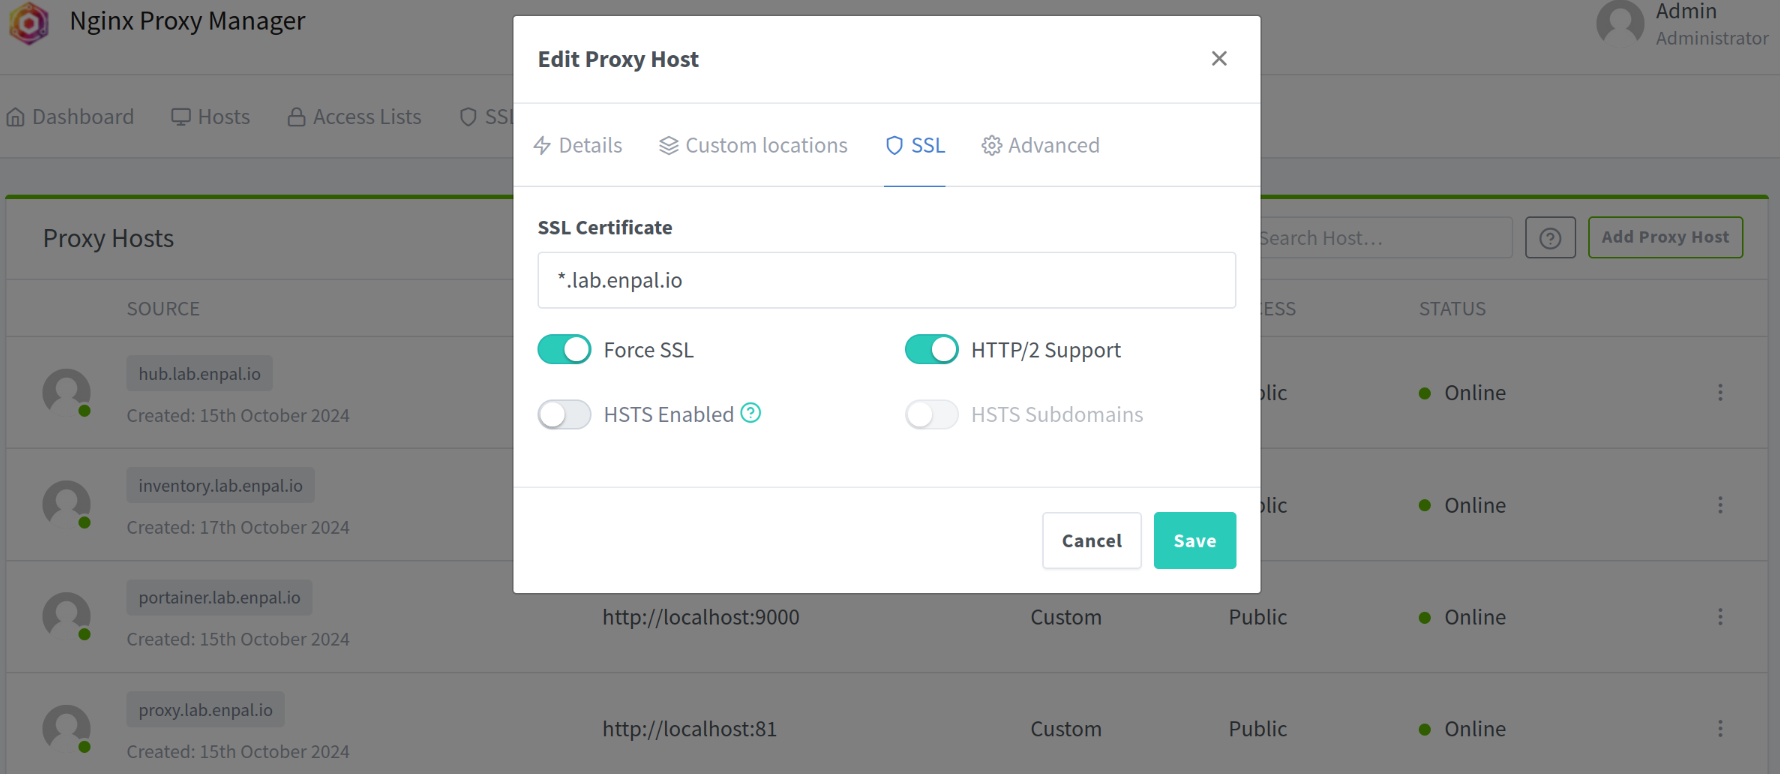
We use a wildcard lets-encrypt certificate on the Proxy Manager. The certificate is valid for *.lab.enpal.io. The PR where the entry was added to the Terraform project can be found here.
This certificate can be enabled on the reverse proxy for each proxy connection:

That way, all services are secured (until the reverse proxy) with SSL. Our inventory service uses the Microsoft login, and this one requires HTTPS, which is working with this solution.


